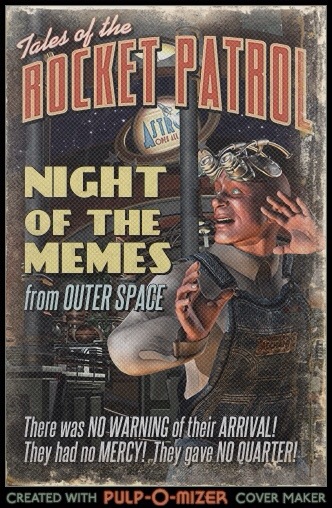
The web is always amazing and this little bit of HTML5 wizardry is a great example. It lets you build your own SciFi pulp cover for free! (Web Resolution).
With unusually little fanfare, Autodesk Mudbox 2009 is now shipping for the Mac. It looks like there will be 30-day demo version available next week. Read about here: http://area.autodesk.com/index.php/forums/viewthread/25575/. Not suprisingly, Pixologic (makers of Zbrush) erradicated the thread on their forums written by concerned Mac users about the lack of displacement map generation. ZB 3.5 is still lost in space, so mac users might want to join the Mudbox party at DashDotSlash.Net, where you can find lots of tutorial material from Wayne Robson (former ZB guru) on the new sculpting entry on the Mac, Mudbox: http://www.dashdotslash.net/.
Wireframe cages are handy. They’re pretty easy to make. In fact, you can make a wireframe of any mesh’s level 1 polygons quite easily. You start with your basic mesh, and apply UVTile UVs from the UV pallet.
Subdivide the model 3 or 4 times so you have some nice detailed geometry to work with and store a Morph Target use “StoreMT” on the Morph Target pallet–we’ll need this later.
Next, we want to mask the wire look. This is easy–alpha 28. It just looks like a square smaller than the the full alpha space.
Use “Mask by Alpha” on the Masking subpallet and invert. I filled out the mask top and bottom squares from my alpha because I’m going to want a place to drop in a logo later.
A quick application of inflate and we have the shape protruding up from the basic object.
If only Zbrush had a way to just save this frame and chuck the rest. It does! Remember that morph target we saved? Well, there is another handy button on the Morph Target panel marked “Create Diff”. Press it once and it will create a new tool in the tool pallet which is the difference between the existing mesh and its stored morph target. Since we only raised up the wire shape, that’s the only difference and that’s what we’ll have left, leaving us with nice wireframe shape.
This isn’t really a Zbrush tip, per se, but I’m often surprised by frustrated modelers when they hit a wall saying, “This is way too complex!” What they sometimes have failed to notice, in the pursuit of efficient modeling is that complex machines are often built out of assemblies which are made of subassemblies which are made up of even smaller sub-assemblies and ultimately out of individual (often cast) parts. Observation of existing machines (and even disassembling a few) can improve your mechanical modeling. To approach this piece of a leg, I didn’t start with the whole piece. Instead, I recognized the sides were (at least in my concept sketch) just a mirrored pair of simple subassemblies. A couple of cylinders and box (suitable beveled by masking and inflating.
Thanks to subtools, I only had to make one cylinder and one box which makes the basic strutSince I don’t plan to take this apart, I went ahead and merged these into a single tool–if I thought I would need to edit the diameters of the cylinders or something, I might have left these in pieces to adjust them. (I do bend them, but fortunately I don’t need them in pieces for that. To build up more of my machine part, I then take two of the assemblies plus a hollow cylinder to build up my next subassembly.
I haven’t built out some super machine with this yet (it will probably be the shin of some mechanical dinosaur when I’m done with it) but you get the idea–work with bite-sized parts and pretty quickly you can get some complex machinery (even without sophisticated texturing.) This whole mechanical part was really created with just 3 simple forms, suitably scaled, deformed, and positioned.
This trick really isn’t mine as much as a simplification of Lemonnado’s excellent tutorial on making Greebles with masks (Zeebles). (You can view the full tutorial here.) The point I want to show you here is that UV’s can play a very helpful role in making repeating detail. Here we take a simple form, made up of a few polygons, and decorate it with a repeating geometry with very little work.
Step 1) Go to the UV menu (or the Texture Menu in earlier versions of ZB3) and select the UVTile button. This will stack/overlap each polygon on top of the UV space. Normally, overlapping UV’s is a BadThing™, but in this case, this is exactly what we want.
Step 2) Subdivide the object to get lots of detail–about 1M polygons (8 levels)
Step 3) Go to the texture menu and select a texture that would look nice. A seamless texture will also look cool. I picked built-in Texture 13, which looks tailored made for Greebles. In one step, the whole object is covered with texture, 1 copy for each polygon at level 1
Step 4) Covert the texture to a mask by going to the Masking pallet and select “Mask by Intensity”. For clarity, you can turn the texture off if you want.
Step 5) Inflate once or twice to bring out the geometry.
A little texturing and it has a nice tech technical surface. Try this with other alphas or make your own after looking at Lemonnado’s Tutorial.
Zbrush has a handy tool that isn’t always well understood, the Sweep3D primitive, which is akin to the lathe tool you might find in other 3D apps. What is handy, is that you can pick the number of sides you want, as well as quickly set up for a simple or complex profile. Here is a simple 8-sided sweep.With pretty straight forward parameters in it’s initialize menu:There are two profiles to set for a Sweep3D object. The first and most important to the shape is the S Profile, which controls the outer shape of the object. To add control points, just tap on the graph. To remove control points, just drag the point off the graph.
The trouble for some users is that the line interpreted between the points is a spline and often doesn’t give a more angular shape. It isn’t obvious, but when you select a point on a graph, a circle appears around the point like a halo. That circle isn’t just to highlight the point–it also controls how smooth the line is that passes through the point! Draw the circle close to the point by dragging its rim, the point gets sharper–further away, the line through the point gets softer. Neat!
The second profile, T Profile, controls the thickness of the object that is swept. By default it give a nice even thickness top and bottom, so I leave this alone.
After converting my simple octagonal object to a poly mesh, and subdivided it 8 times with SMT (smooth) off, I can then start decorating it to make it a little more mechanical looking. Picking a simple alpha from my collection (this one from Codeman Studios) I can just drag a marquee of the alpha by starting my click off the object and dragging across. Do it twice, and I have a nice set up to inflate some ridges from the surface.
A couple of inflates (deformation menu) and then Iuse radial symmetry of 8 and couple of different alphas to decorate the object further getting something like this.Add texture and I have another mechanical part for a machine.
For years, model makers, whether working in the real or 3D world have known one secret to making things look realistic is often to add small details that represent the mechanical surface of the machine in question. To speed things up, especially in the days when we worked in styrene instead of bits, small pre-made casts of mechanical “bits”, referred to as nurnies or greebles were glued to objects to make that object look “real.” It’s a convincing illusion, even with the simplest model. In this example, I’ve taken the simplest model I could think of, a straight edged cube. For a real project, I would mix in six or seven nurnie types to increase the complexity of the surface, but for this example, I just used one, a hatch and varied its size. Zbrush has a fast way to do this–it’s called the Mesh Insert brush.
A Nurnie By Meshweaver
The Mesh Insert brush allows you to pick another model and just stick it to the surface of the model. The “Brush Mod” slider controls how deep the object will be placed on the surface. (I often slide it up around +40 to +60 so that the nurnie generally riding right on the surface.
The main point of nurnies is to save time, so you may want model for yourself a few Lego-like pieces to stick onto your next project. I have a library of few hundred in various resolutions I’ve kept handy for my projects. 🙂
If you really want to save yourself time, Meshweaver Productions make two very extensive collections. For £82.48 GBP (about $125 USD), you can have hundreds (about 550, each rendered in multiple resolutions) of detailed nurnies in your library which represent hundred of hours of saved work. The hatch I used is from their second collection of of parts, many based on tank pieces. (I don’t take compensation on this blog–I bought these myself and really, really like this product.)
If you look back at part 5 of this series on Zbrush Mechanical, you’ll quickly be able to make fast alphas from your nurnies as well, expanding the possibilities for high quality detailing of your mechanical projects.
If you’re serious about mechanical modeling and surfacing, you owe it yourself to learn about nurnies and start collect your own parts for nurnification.
While Pixologic was busy pissing off its customers today, Autodesk has been sneaking up on them.
The big news for sculptors at Macworld: Autodesk Mudbox 2009 is coming to the Mac! No details yet, but published in Architosh: “While some products were previously announced for the Mac today Autodesk is unveiling Mac OS X support for Autodesk Mudbox 2009, Autodesk Toxik 2009, and Autodesk ImageModeler 2009 for the first time.”
You can bet that I’ll be shelling out the dough for Mudbox when available and will try to get a Mac first-look here as shortly thereafter.
Now things get interesting!
—————–
Update:
From the press release. Expected ETA is February this year.
“Autodesk Mudbox 2009: A highly intuitive application for painting, texturing and re-touching 3D models. Mudbox software gives 3D modelers, artists and designers the freedom to create without worrying about the technical details. Breaking the mold of traditional 3D modeling applications, Mudbox 2009 provides an organic brush-based 3D modeling and texture painting experience that ignites the creative process. Mudbox 2009 for Mac OS X is expected to be available in English in February 2009. Autodesk suggested retail pricing for Mudbox 2009 is expected to be $745 USD*.”
Zbrush makes it easy to quickly create an alpha from geometry, which in turn can be used to detail objects. Let’s take the hex nut from the previous exercise. By turning SMT on in the Geometry Subpallet art level 4 and subdividing a bit more I’ve rounded the edges to give me a nice bevel. I just position it so I’m looking straight down on it, (use shift-drag outside the object to snap the view to the nearest orthogonal position.) To make an Alpha from this shape, it’s just as easy as going to alpha pallet and clicking “GrabDoc”. A new alpha is available on your alpha pallet, starting “ZGRAB” like magic!
You’re not quite done yet–ZB prefers square alphas to avoid distortion and because I was lazy, the canvas was actually 800 x 600. It’s a quick fix in an image editor, so export the alpha from the image pallet, fire up photoshop and crop to 512×512.
Name the file it something suitable, reload it into ZB, and now you sculpt with it using any brush you like (I prefer the Clay or Layer brushes for example.)
Turn on symmetry and with one stroke, I have detailing on a plate.

 The web is always amazing and this little bit of HTML5 wizardry is a great example. It lets you build your own SciFi pulp cover for free! (Web Resolution).


